Difference between revisions of "Import"
(Add service times) |
|||
| Line 1: | Line 1: | ||
| − | The Import button is a powerful tool to add multiple destination addresses at once. You can copy addresses in any application and paste those in the Import textarea. | + | The Import button is a powerful tool to add multiple destination addresses at once. You can copy addresses in any application and paste those in the Import textarea. Adding locations in bulk has several advantages. Obviously, you don't need to enter each address in the search box one by one, which saves time. But next to that, placing the addresses on the map is also faster. Instead of sending each address to a [[Geocoding]] service, the route planner database is checked first. |
| − | + | [[File:Import_dialog.png]] | |
| − | 1. Select the addresses in the origin application, e.g. Word, Excel or Outlook | + | == Instructions == |
| + | |||
| + | 1. Select the addresses in the origin application, e.g. Word document, Excel spreadsheet or Outlook email | ||
2. Copy all addresses using the correct keyboard combination (often Ctrl-c) | 2. Copy all addresses using the correct keyboard combination (often Ctrl-c) | ||
| Line 23: | Line 25: | ||
* If there are problems, a message will be displayed after all addresses have been handled. | * If there are problems, a message will be displayed after all addresses have been handled. | ||
| − | + | * The import dialog accepts coordinates and JSON too. | |
| − | |||
| − | |||
== Additional fields == | == Additional fields == | ||
| Line 45: | Line 45: | ||
== WEBFLEET == | == WEBFLEET == | ||
| − | If you have a [[WEBFLEET]] account a button is added to allow import of WEBFLEET | + | If you have a [[WEBFLEET]] account a button is added to allow import of orders from the WEBFLEET platform. |
Revision as of 12:04, 1 March 2017
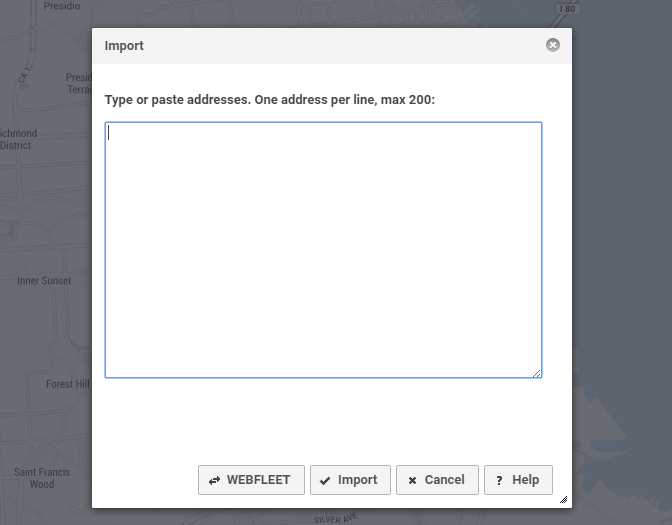
The Import button is a powerful tool to add multiple destination addresses at once. You can copy addresses in any application and paste those in the Import textarea. Adding locations in bulk has several advantages. Obviously, you don't need to enter each address in the search box one by one, which saves time. But next to that, placing the addresses on the map is also faster. Instead of sending each address to a Geocoding service, the route planner database is checked first.
Instructions
1. Select the addresses in the origin application, e.g. Word document, Excel spreadsheet or Outlook email
2. Copy all addresses using the correct keyboard combination (often Ctrl-c)
3. In RouteXL, press the Import button
4. Select the textarea and paste the addresses (often Ctrl-v)
5. Press the Import button
6. Wait until all addresses have been added
Notes
- Each address should be on one line.
- If locations are not found, use the correct Address format or select another Geocoding service.
- If there are problems, a message will be displayed after all addresses have been handled.
- The import dialog accepts coordinates and JSON too.
Additional fields
You can also import names, service times, time windows and comments with an address. These fields will be stripped from the input before geocoding and added to the location on the map.
- Names between @ and @
- Service times in minutes between ( and )
- Ready and due time as hh:mm before and after >>
- Comments between { and }
Example
Kennemerstraatweg 464, 1851 NG Heiloo, The Netherlands @Our office@ (15) 09:00>>17:00 {Use the main entrance}
WEBFLEET
If you have a WEBFLEET account a button is added to allow import of orders from the WEBFLEET platform.
